-
Sign your page at the bottom or top. Somewhere, or it’s not official. Email me when you have finished your exhibit page. *Don’t forget to upload your page and object into your drop box on Sakai.
-
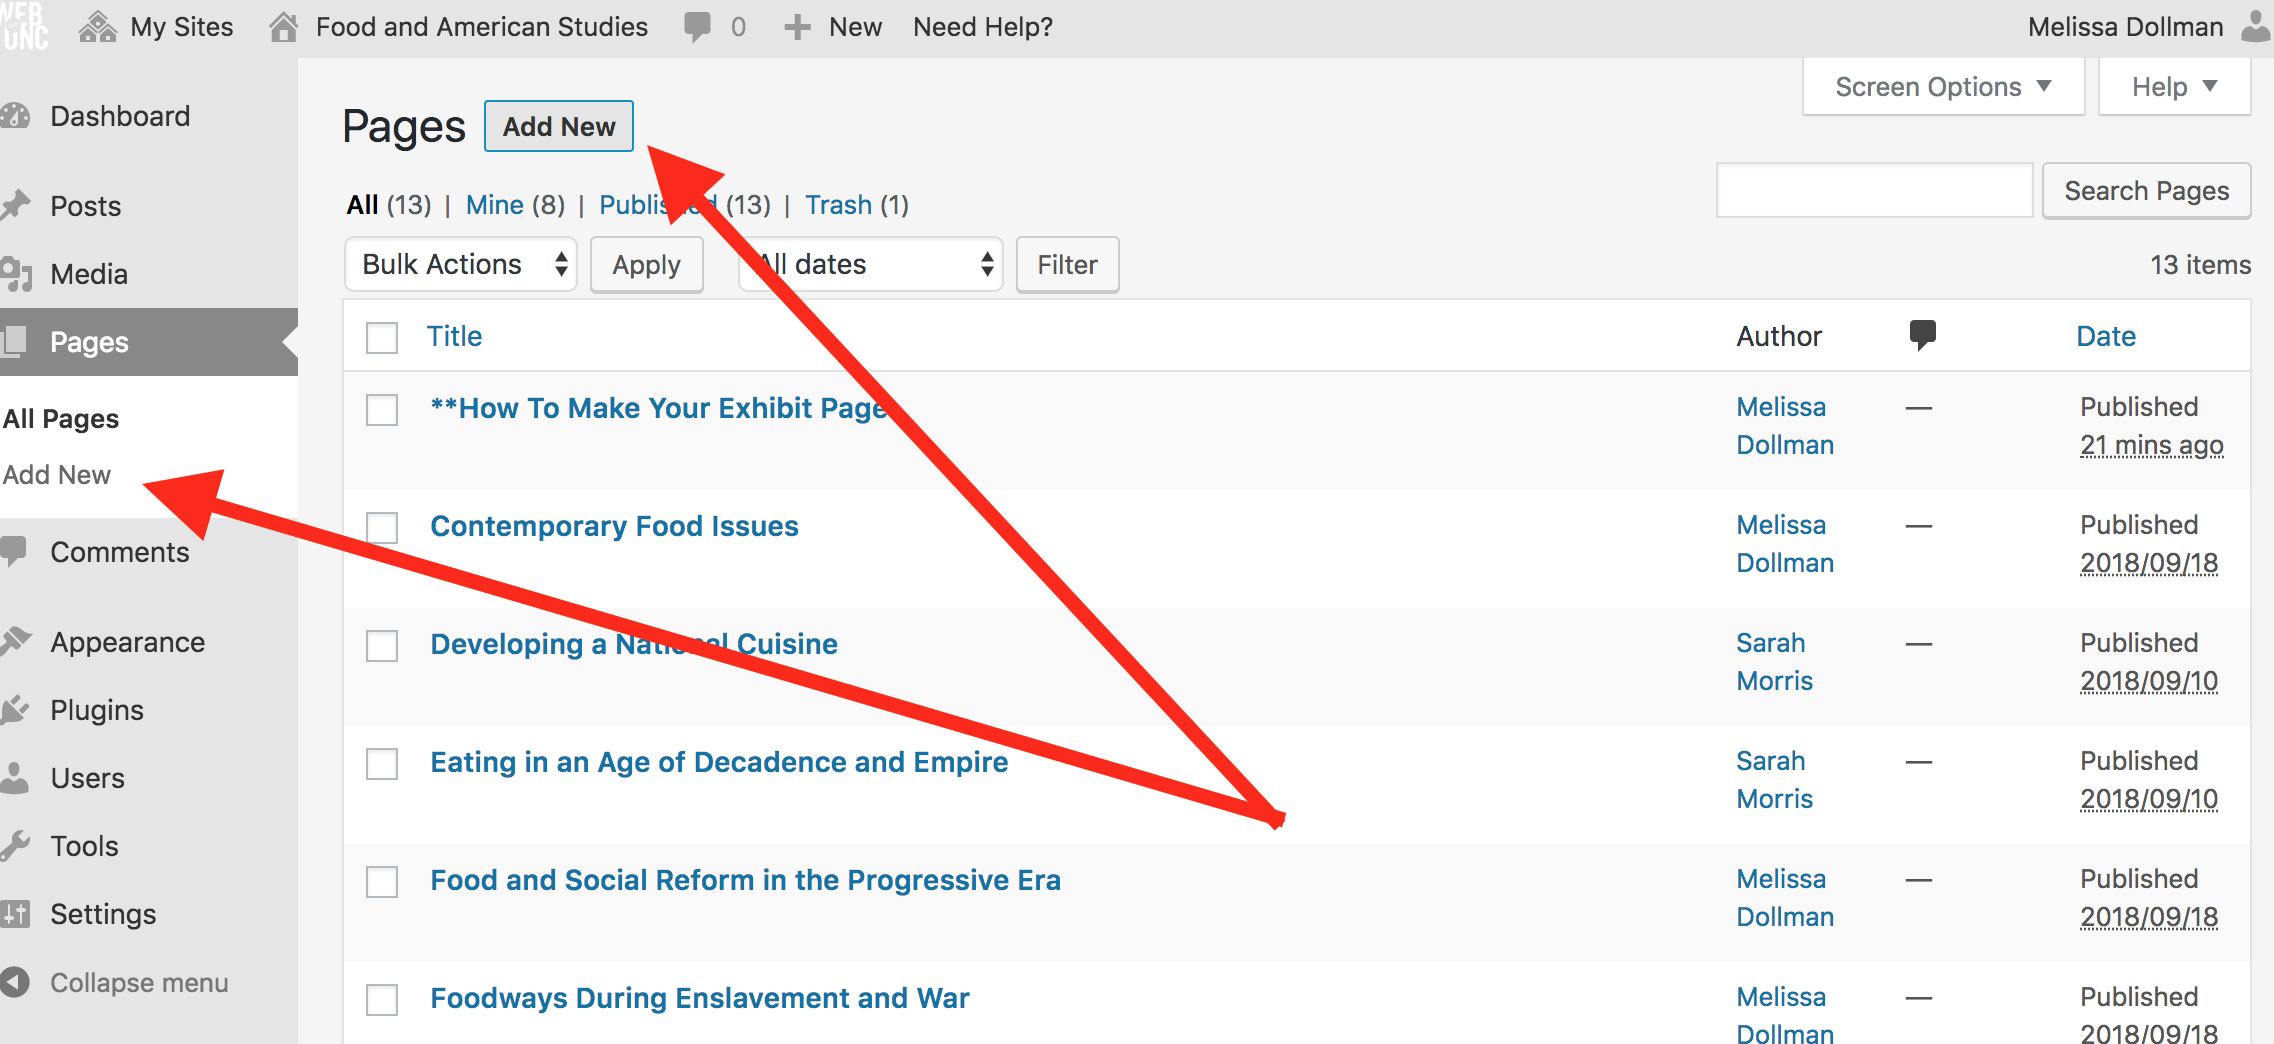
From the Dashboard, click on “All Pages” and then “Add New” or simply “Add New ” listed under “All Pages”. You might prefer the former as it will allow you to see all the pages already created.
-
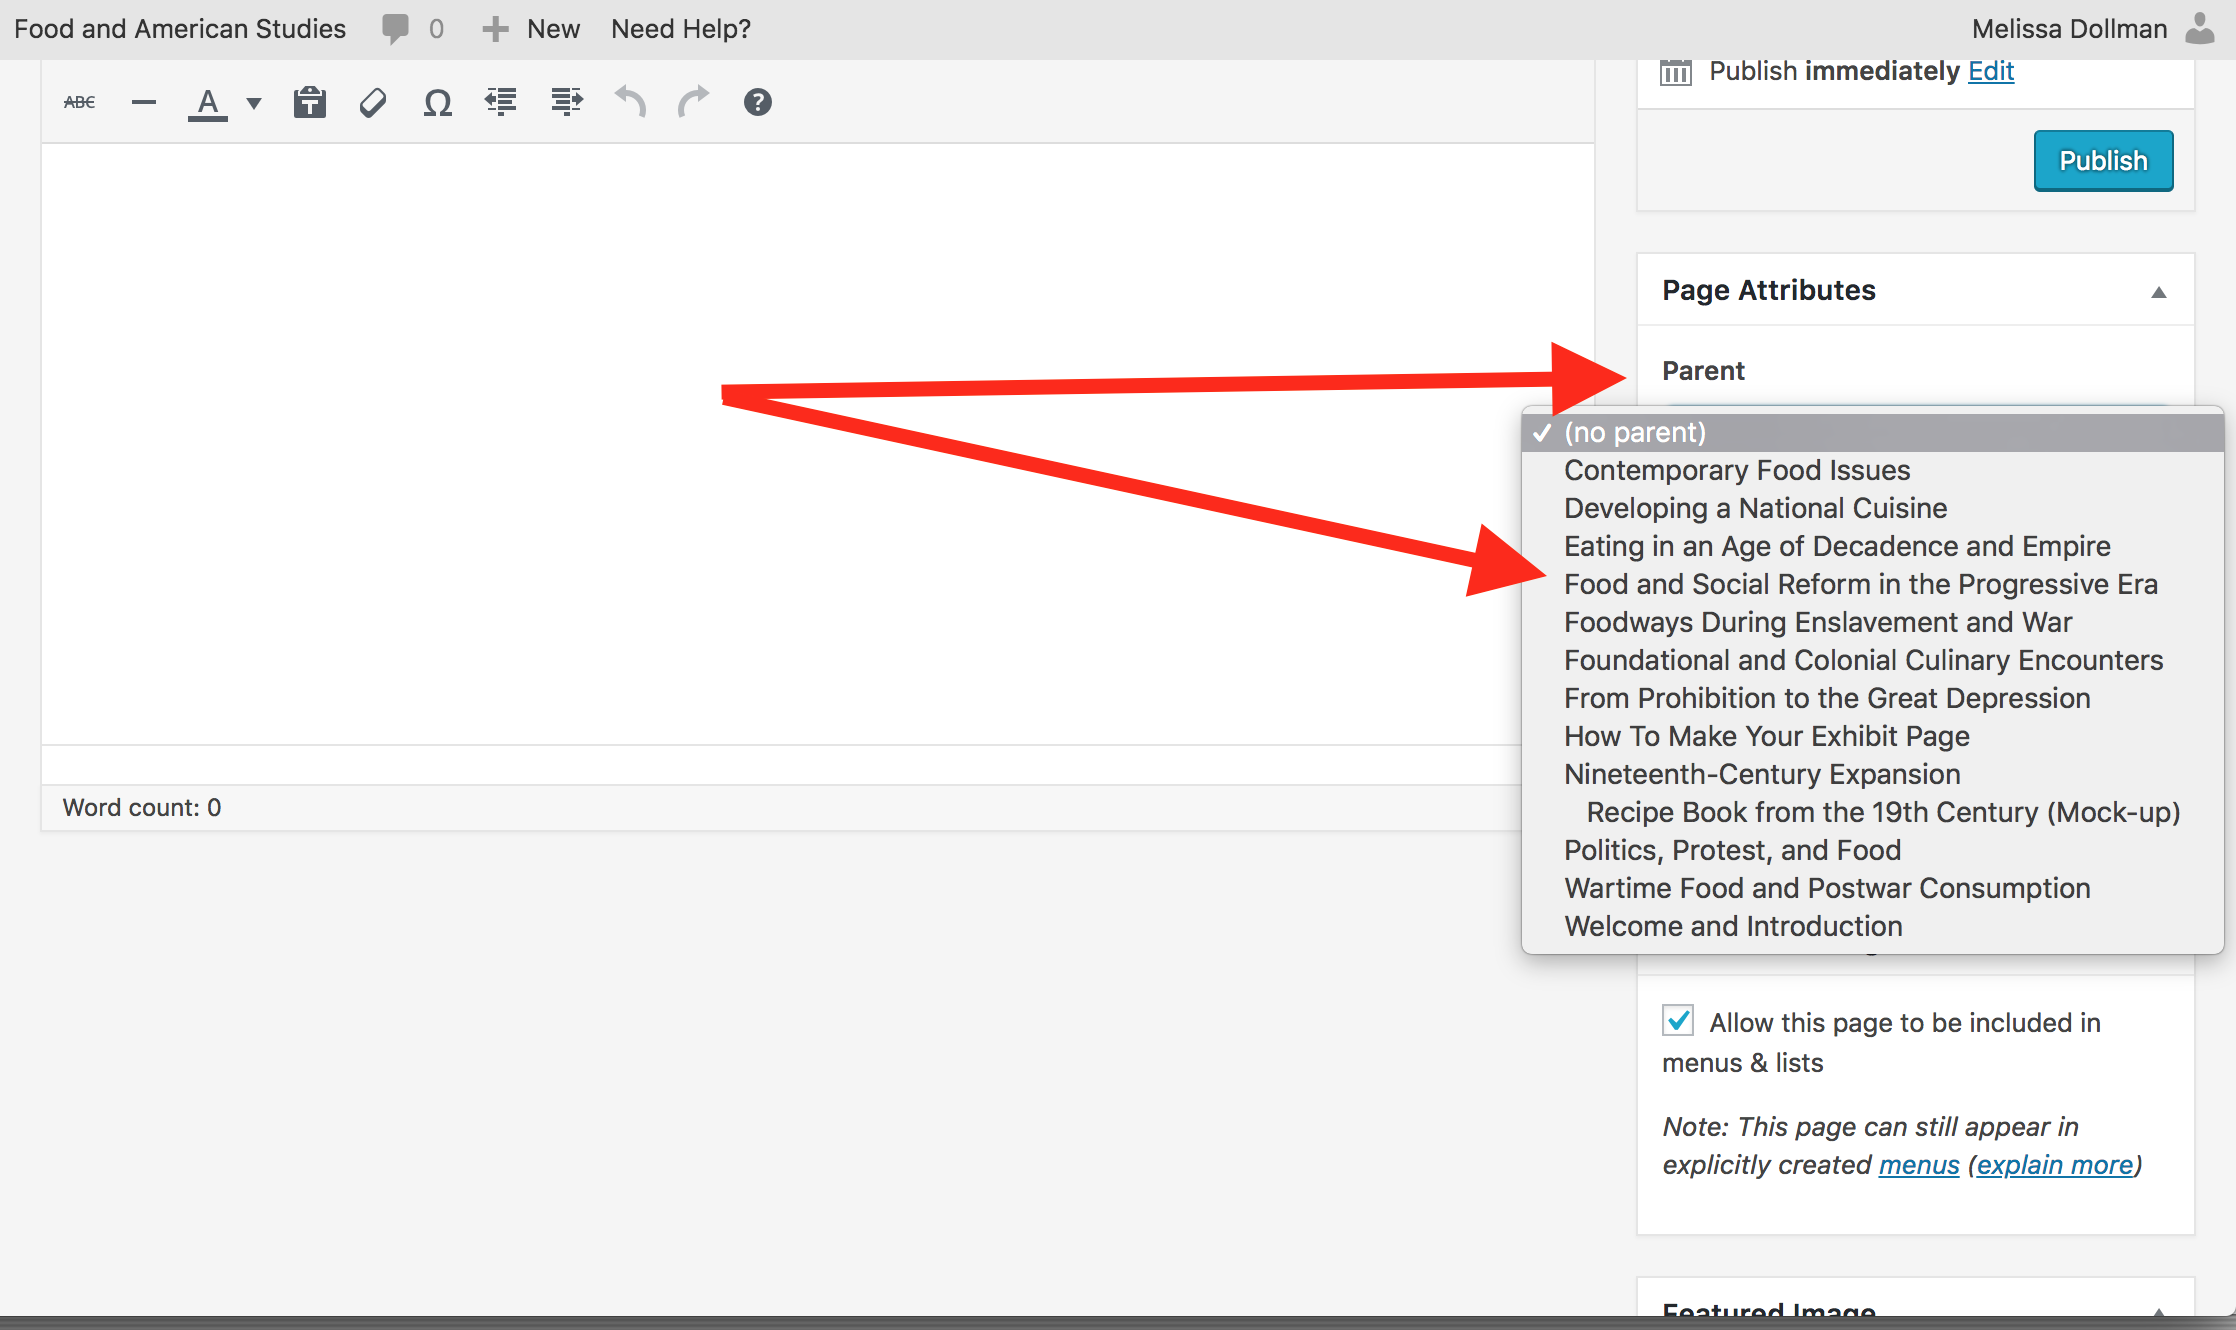
Make sure you choose a “parent” for your page. That refers to the project category to which your exhibit belongs. This will nestle your page under the right category in the menu bar. Ping me after you finish and I add it to the main menu. Do not do this yourself. Thanks- Melissa

Adding text…
-
I think adding text is pretty straightforward, however, for more advanced techniques, fiddle around with the drop-down button at the top left to change the size of headings (for instance, this text is formatted as “Heading 4”.) Also, if you click on the button at the top right
 you can change the formatting of text.
 -
Reality-based scare tactic: We highly advise you to write your text in another application (Microsoft Word or whatever) and cut/paste it in. Then format text and add a photo, etc. It will hurt your pride and feelings if you write a beautiful caption, then accidentally erase it and have to write it again. Also, you may not like the line spacing once you’ve pasted in (or, despite our warning, written your text in WordPress). If so, you can use the text editor in the upper right-hand corner of this workspace above the X made of tiny arrows. Click on that tab and remove the spaces between lines. If you know HTML, go to town on your formatting.
Adding photos…
-
IMPORTANT: We need to keep files sizes uploaded to the class media library, about 2 MB or under. Ask permission to add something bigger. They also must not be less 300 and 600 pixels wide. 72-144 DPI. [More on image resolution here. We are asking for slightly higher quality.]
Steps
-
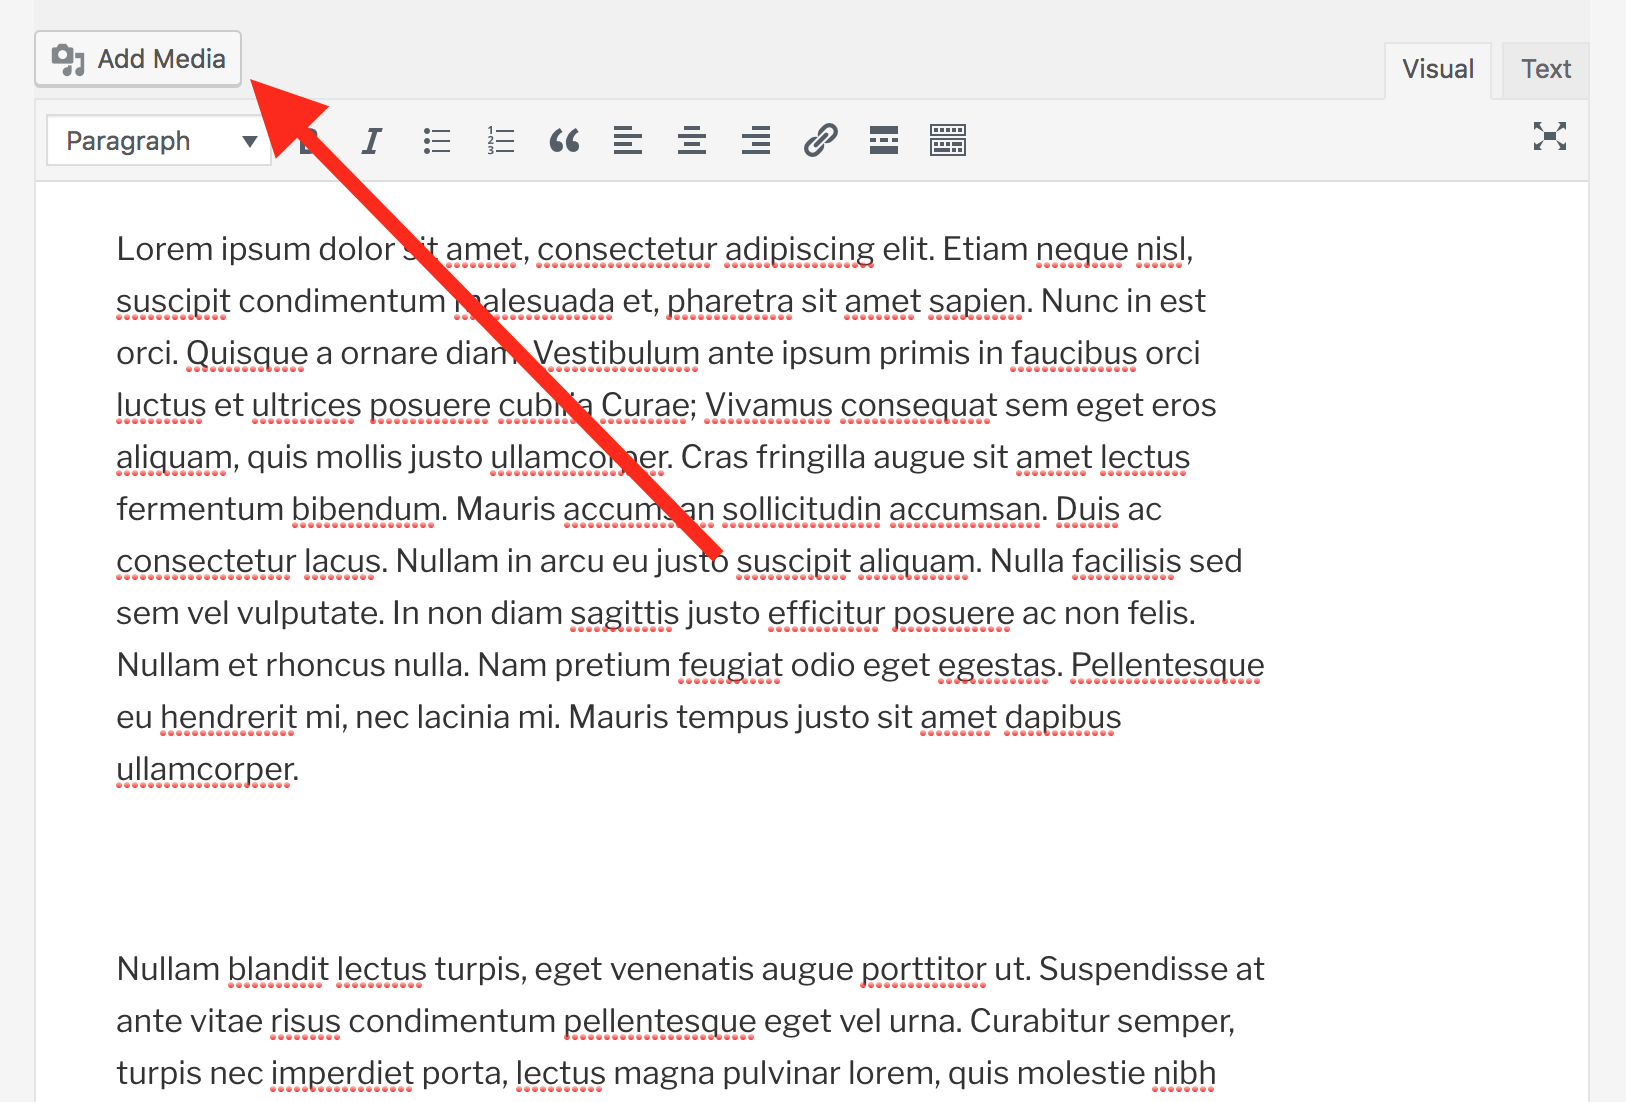
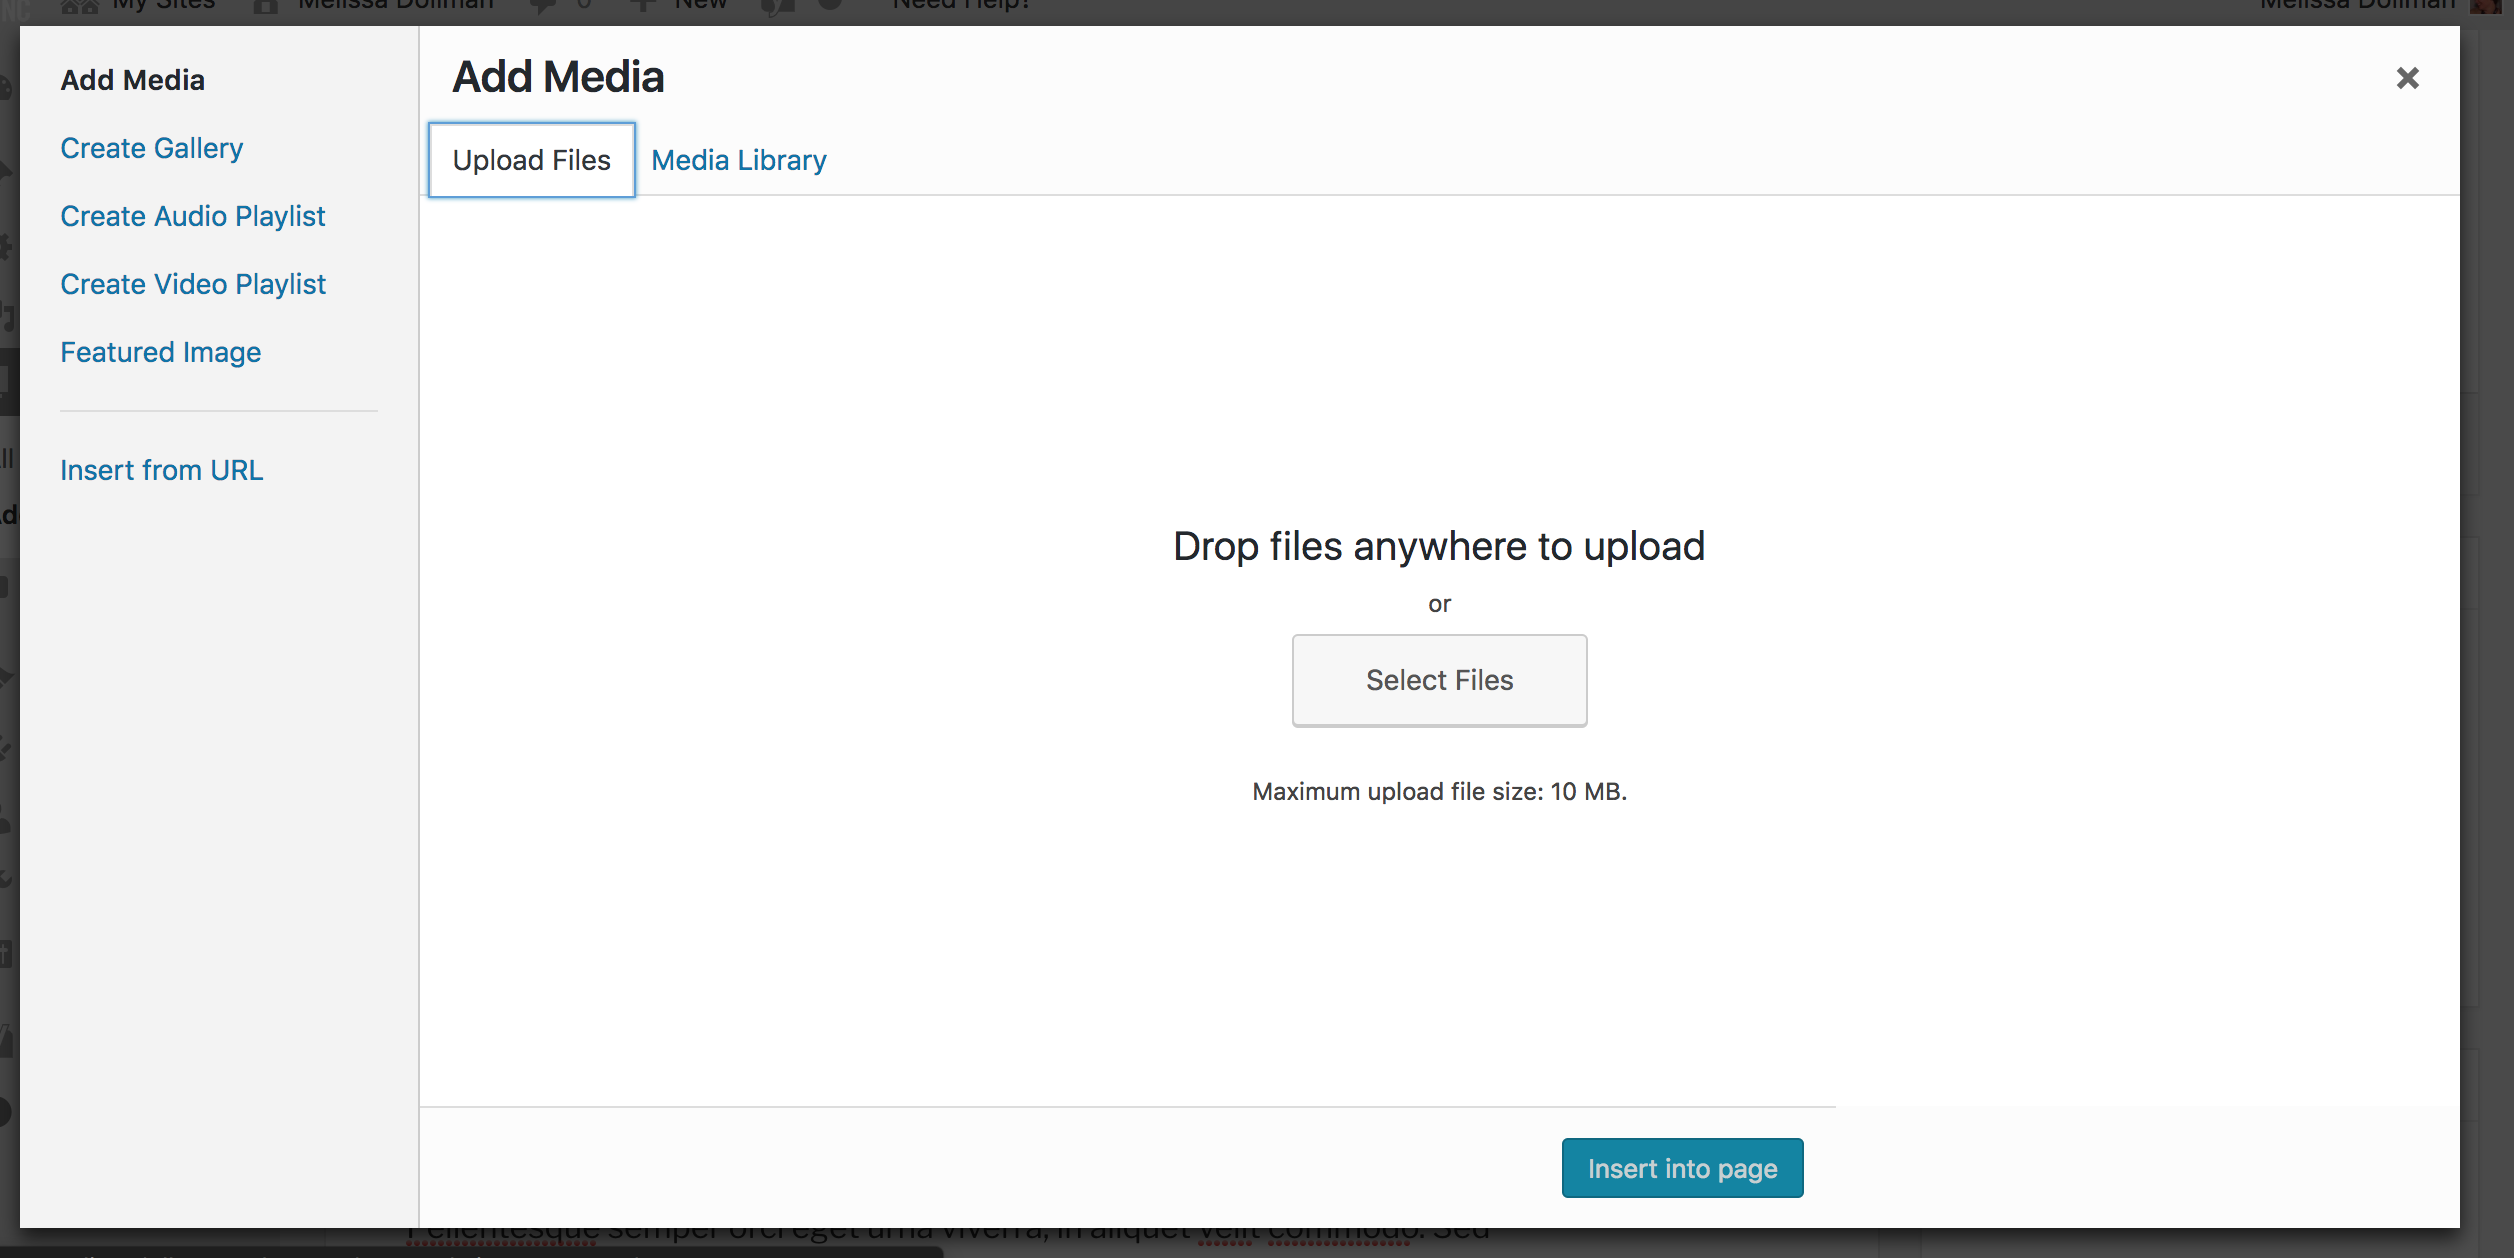
Somewhere on your page you may want to add a photo (for other media files, see a section below). Click on “Add Media”.
-
Choose the “Upload Files” tab and click on “Select Files” (or if you’ve already got your file selected in a finder window on your computer, drag it in.
-
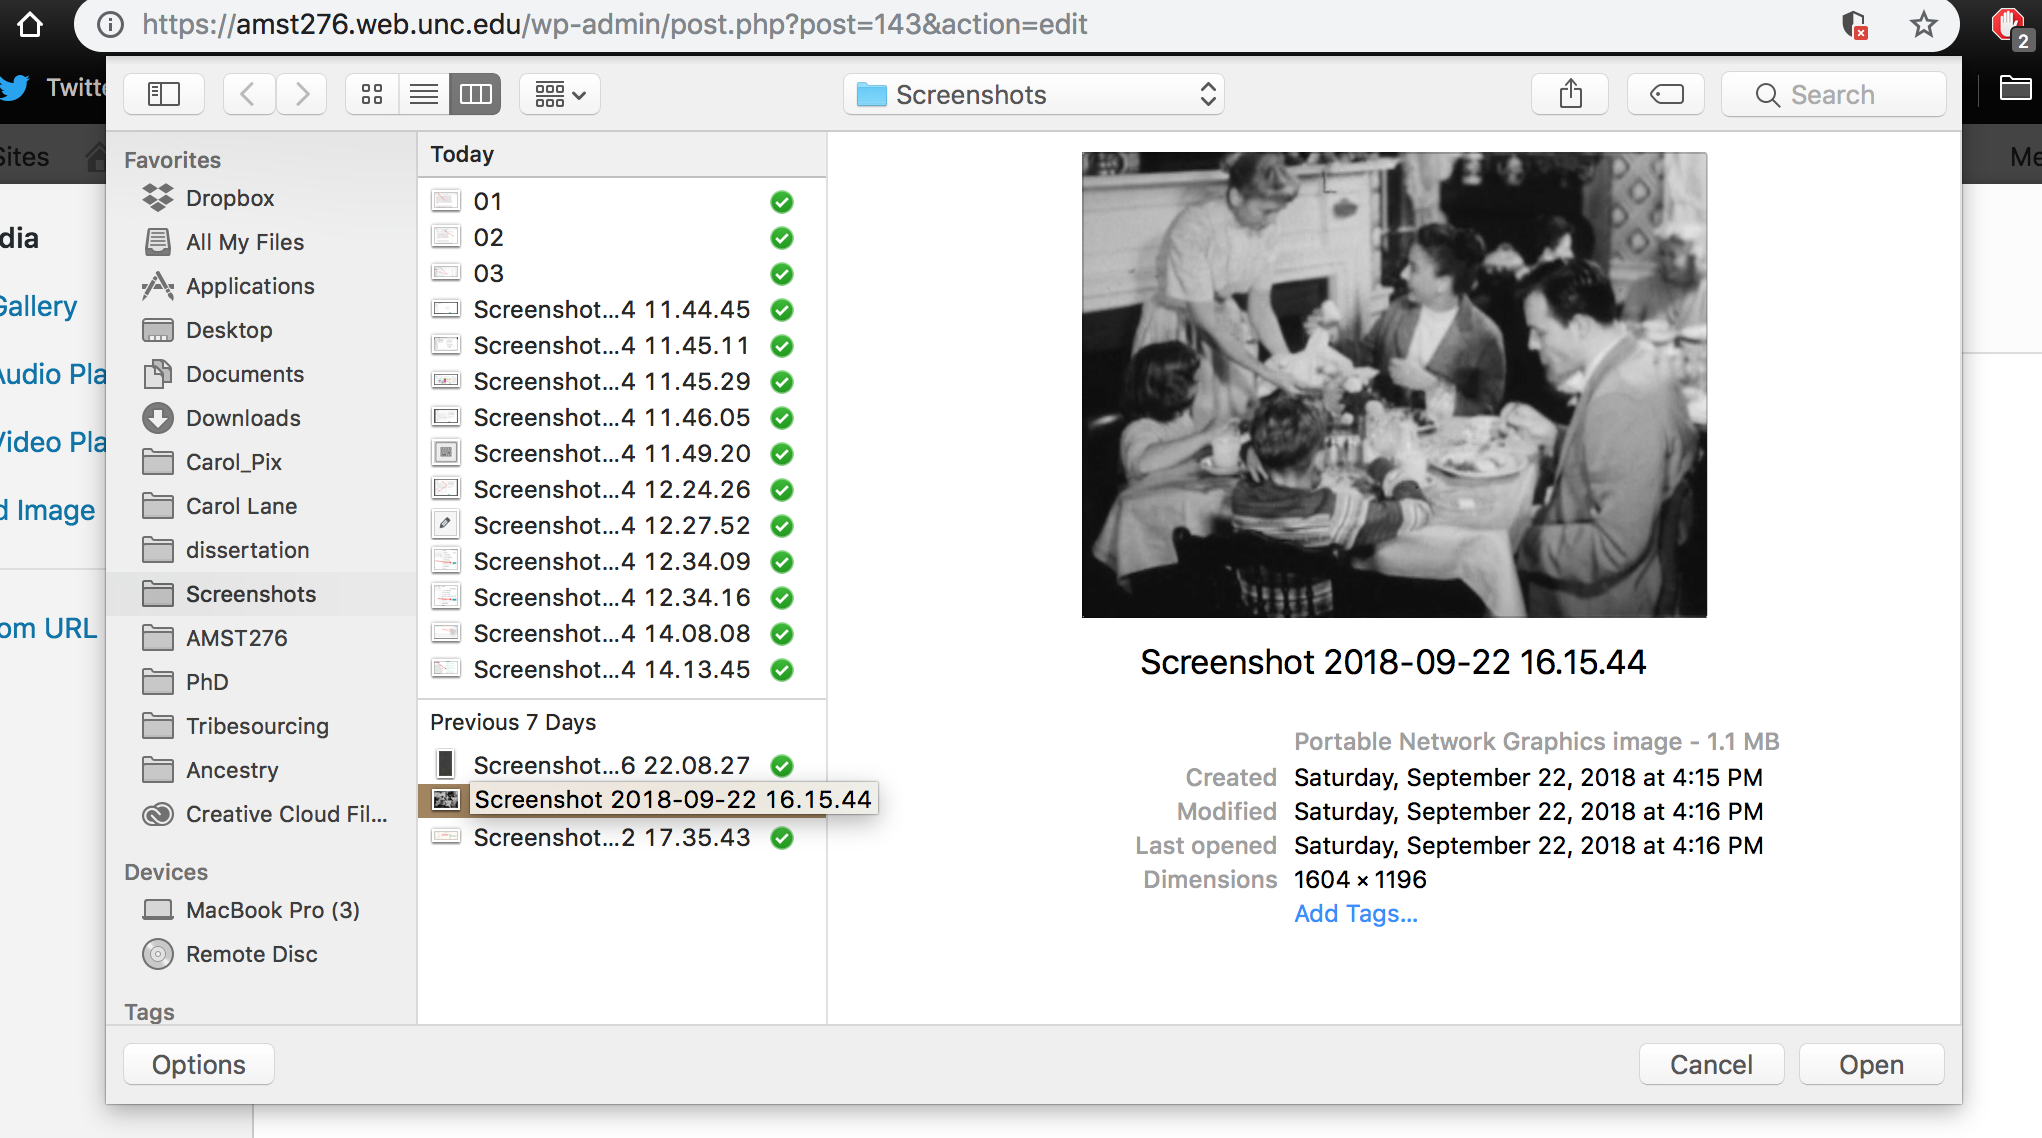
It will prompt you to choose a file on your computer.
-
It then loads it into the site’s Media Library. Once loaded, click the blue “Insert into page” button.

-
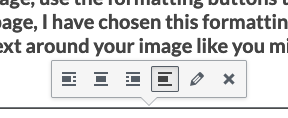
Once the image has been imported into your page, use the formatting buttons to format how you want the image to look in relationship to your text. For instance, in this page, I have chosen this formatting which places it in the page, on the left, free of text on the left or right sides. If you want to wrap text around your image like you might see in a newspaper or magazine, just play around with the other formatting buttons.
-
Now click on your image and choose the pencil button.

-
Here you can change the size of the image, orientation on the page, etc. Add your caption in the caption field after you’ve clicked on the photo to edit it or right when you upload it. Also, give the photo a memorable name so you can find it again, and importantly make “Link to” say “Media File” and check “Open link in a new tab.” This will open your image in a new tab, which is nice because it allows a viewer to really examine it. Make sure you hit the blue “Update” button.

-
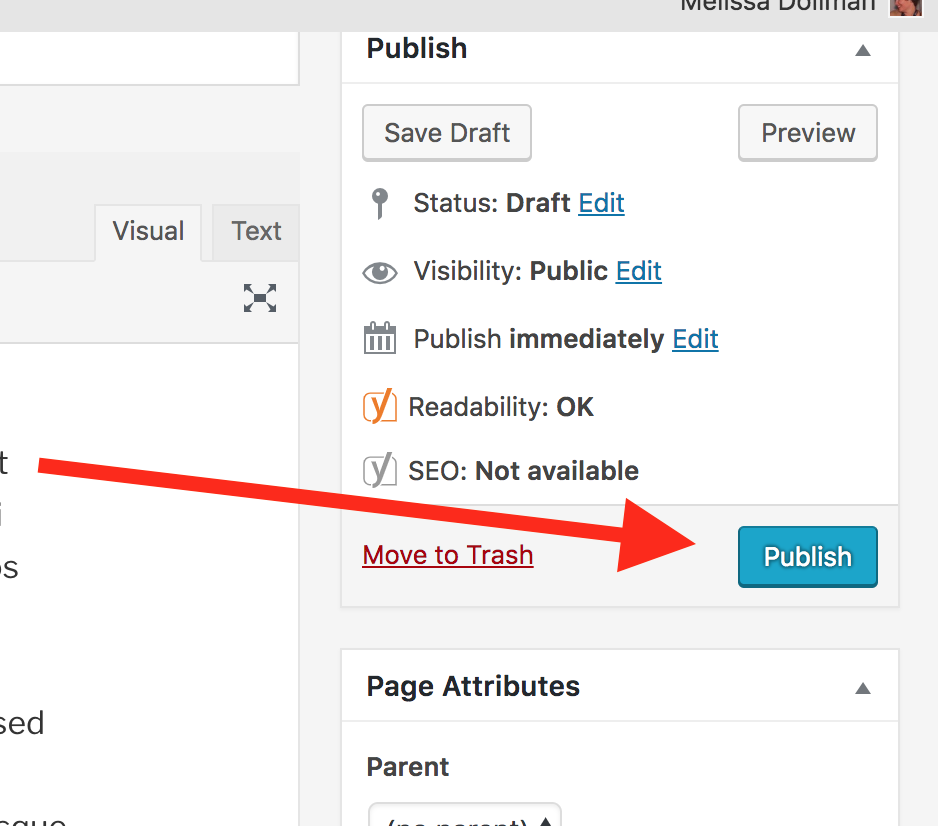
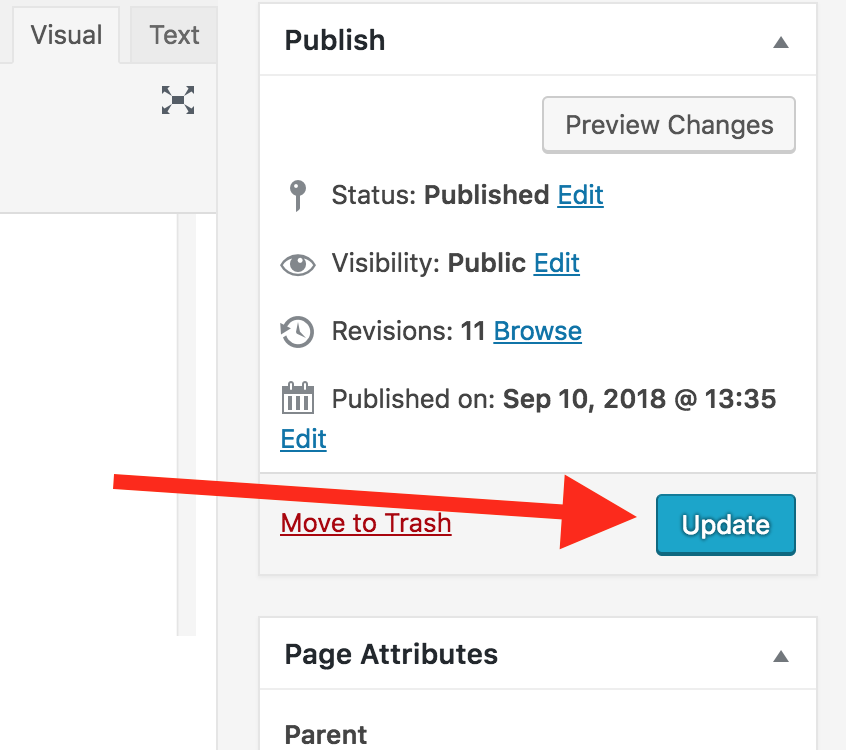
*You must click either the blue “Publish” button, or alternatively if you’ve already done this, “Update” on the right-hand side of the workspace. “Preview Changes,” above that, will allow you to view your page before you commit to the changes.
A real-life example:
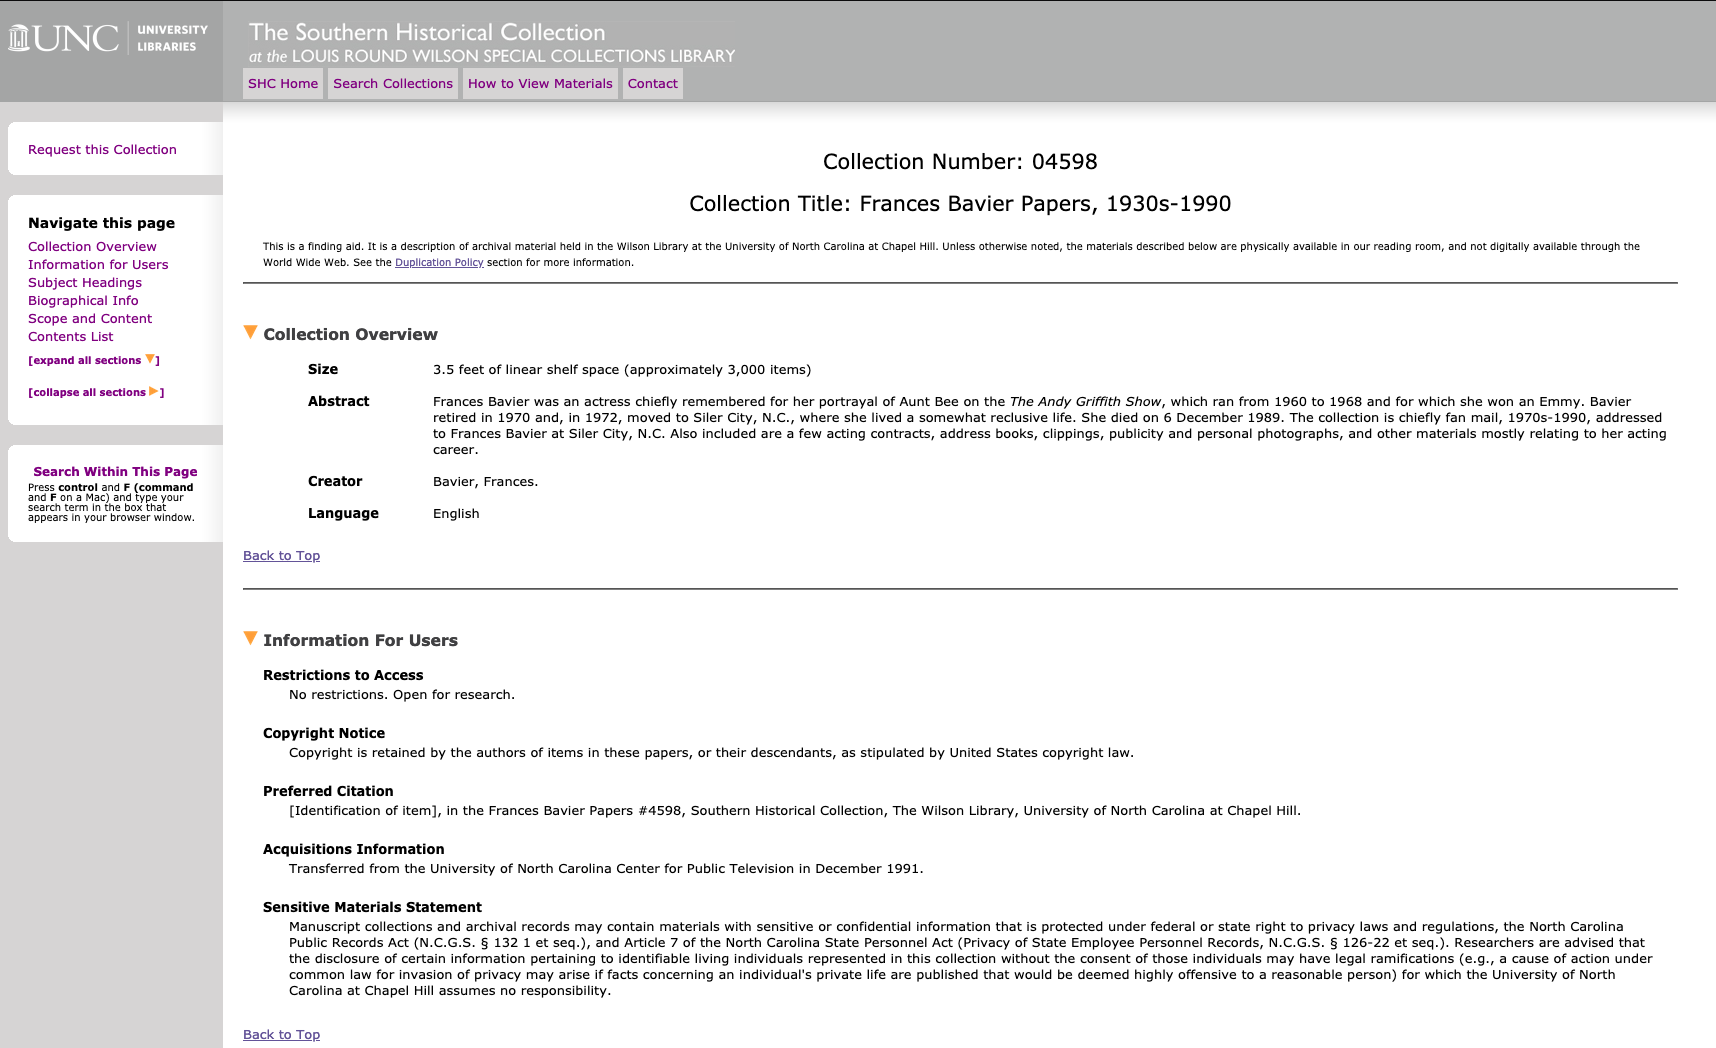
[PM 10 Jan, 1973], in the Frances Bavier Papers #4598, Southern Historical Collection, The Wilson Library, University of North Carolina at Chapel Hill.
-
Find the information from your source. In this case the unique identifier is written on the letter and the finding aid below shows the collection it came from, and how to precisely cite the item:

![]()
Using audiovisual media in your post…
-
First, you’ll need to upload a video file to either YouTube or Vimeo or for audio, a streaming service like Soundcloud. You cannot upload video or audio clips directly into Wordpress. Once that’s done (set privacy settings to public or unlisted) cut/paste the URL directly into your page like this:
-
For more advanced students, you can also customize the height/width of the player and its alignment by using a short code, see here: https://en.support.wordpress.com/videos/youtube/
-
Same goes for Vimeo:
-
For more advanced students, you can also customize the height/width of the player and its alignment by using a short code, see here: https://en.support.wordpress.com/videos/vimeo/
-
For Soundcloud, please upload your file there, and see: https://en.support.wordpress.com/soundcloud-audio-player/
Important: How to change your static URLs into live links
-
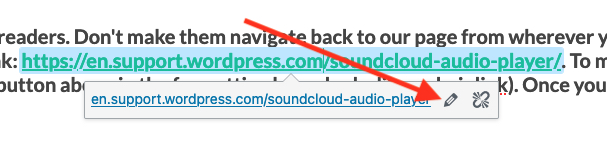
Please, please be kind to your readers. Don’t make them navigate back to our page from wherever you send them off to. For instance… when adding this link: https://en.support.wordpress.com/soundcloud-audio-player/. To make this URL to the left live, I highlighted it, clicked the link button above in the formatting bar — looks like a chainlink). Once you’ve done that you’ll get this pop-up:
-
Then click on the gear button and you see this screen. Check the box next to “Open Link in a new tab” and update.
